In the last blog, we covered the Variable Manager in Lectora®. Now we will talk about the other important management tool, the Resource Manager. This is also found in the Manage group of the Tools ribbon right next to the Variable Manager.

The Resource Manager
As the name implies, the Resource Manager is used to manage all of the resources that you import into a Lectora title, such as image files, video files, audio files, animated GIF files, Flash files, and attached or linked documents, such as PDF files. It is essentially a library of every resource that you’ve imported into or linked to your Lectora title. You can use the Resource Manager to view all of your resources in one place, get information about them, and manipulate them in various ways.
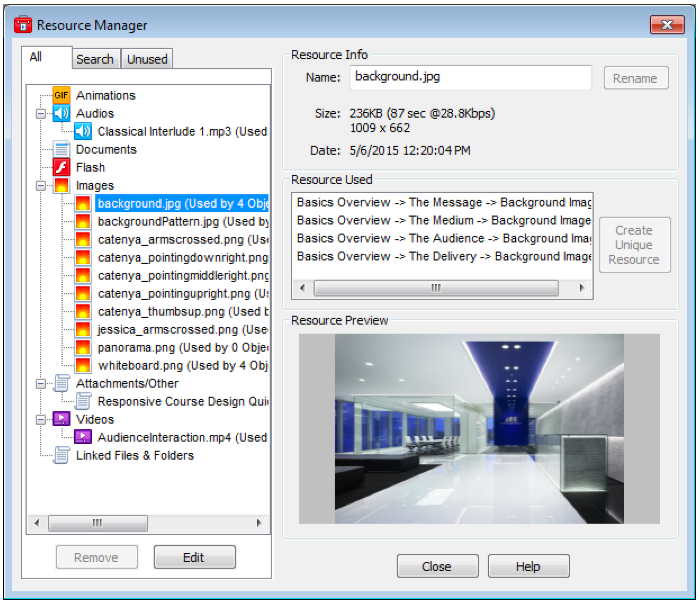
Resource Manager – All Tab
If you are using Lectora Online, the resource manager will look slightly different than this screen capture from the desktop version of Lectora. All of the features are the same though with one exception, which I’ll point out later.
When you open the Resource Manager, the All tab is active by default. All of the resources imported into or attached to the title are listed in the left-hand pane. Selecting one of the resources in the left-hand pane displays the Resource Info on the right. And if the selected resource is an Image resource, a preview of that image will be shown in the Resource Preview pane.
You can rename a selected resource if you wish by typing a new name into the Name field and clicking the Rename button. This is handy if you’ve discovered that the name of an existing resource is incorrect or perhaps contains characters that are incompatible with the platform on which you intend to run the content. (This can happen when resources were given a name on a different operating system from your own or perhaps typed in a different language.) The Rename button will enable once you begin to type in the Name field. If you are using the desktop version of Lectora, clicking the Rename button will rename the resource within the title as well as the actual resource file itself in the resource folders (images, media, etc.) associated with the AWT file.
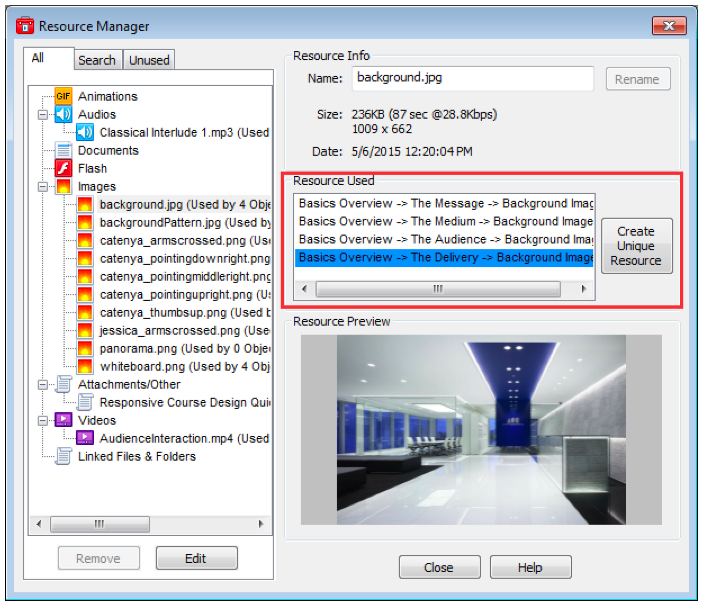
Resource Used Pane
The Resource Used pane displays the paths to every place in the title where that resource is used. Clicking on one of those paths will select the instance of use in the Title Explorer. It will also enable the Create Unique Resource button next to the pane if the resource is used more than once in the title. Clicking the Create Unique Resource button will duplicate the selected resource and give it a new, unique name. This is useful if you want to modify a resource independent of the other instances where it is used. For example, say you have an image that is used on several pages, and you want to use the same image on one of those pages but with some text added to it or some other type of modification. You can create a unique resource via the Resource Manager and then edit the new resource in-place without having to import and position a new file.
To edit a resource in-place, double-click the resource in the Title Explorer or in the work area to switch to its Properties tab and click the green pencil icon. For desktop users, the resource will open in the editor you have designated in your Lectora Preferences. For Lectora Online users, an image resource will open for editing in Pixlr. You can also right-click the resource in the Title Explorer or in the work area and choose Edit from the context menu. For desktop users, selecting the resource and typing Shift+Enter will also open the resource for editing.
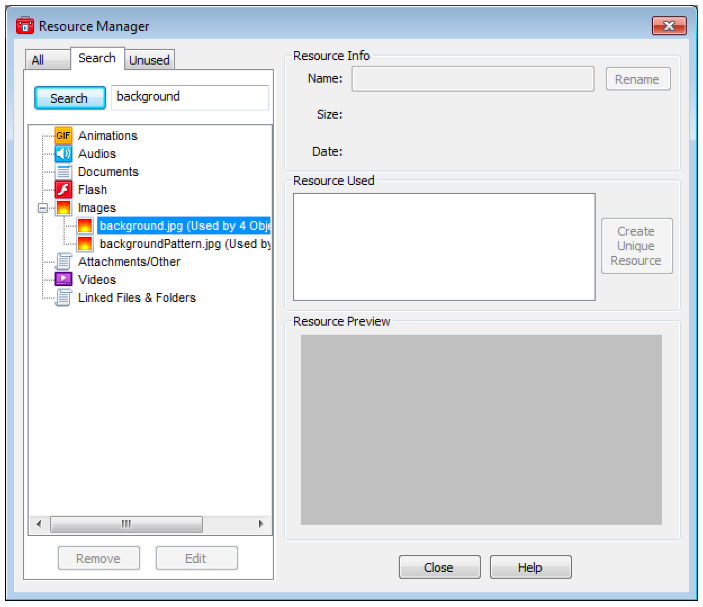
Resource Manager – Search Tab
On the Search tab, you can search by name through all of your resources. Type all or part of the resource name into the entry field at the top and click the Search button. In the example above, you can see that two resources containing the word “background” were found.
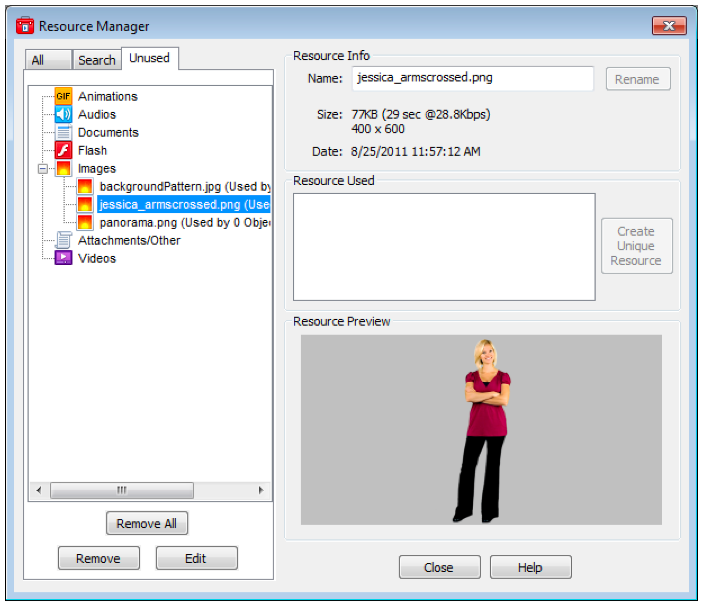
Resource Manager – Unused Tab
The Unused tab lists all of the resources that have not been placed somewhere in the Title Explorer or used with an action, such as the Change Contents action. Once you are finished editing your title, you can choose to remove all of the unused resources if you wish, although they will not be included in the published content regardless. However, if you are using the desktop version of Lectora, the resources you remove from your title will not be removed from the resource folders (images, media, etc.) associated with the AWT file. So, removing a resource from the title does not delete the actual source file. It simply disassociates it from the AWT file.
Optimize Size or Convert to MP3 or MP4
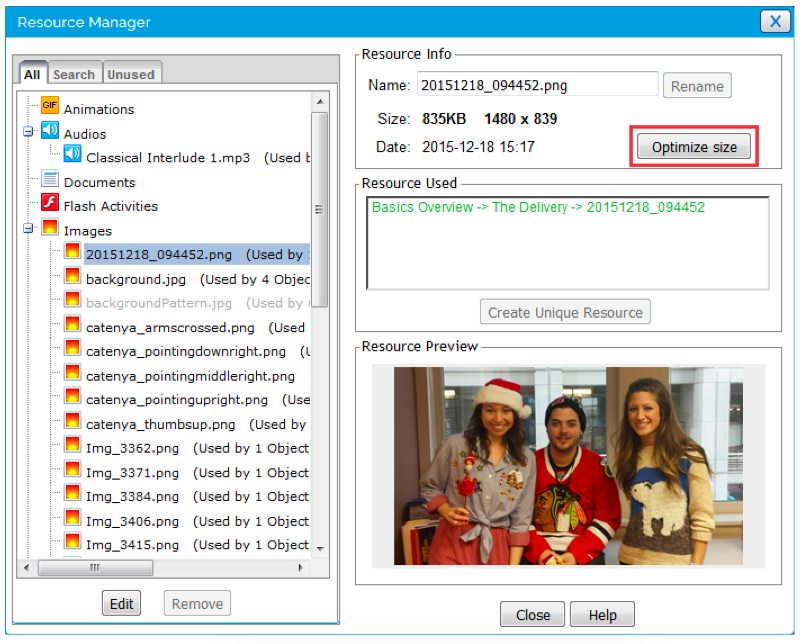
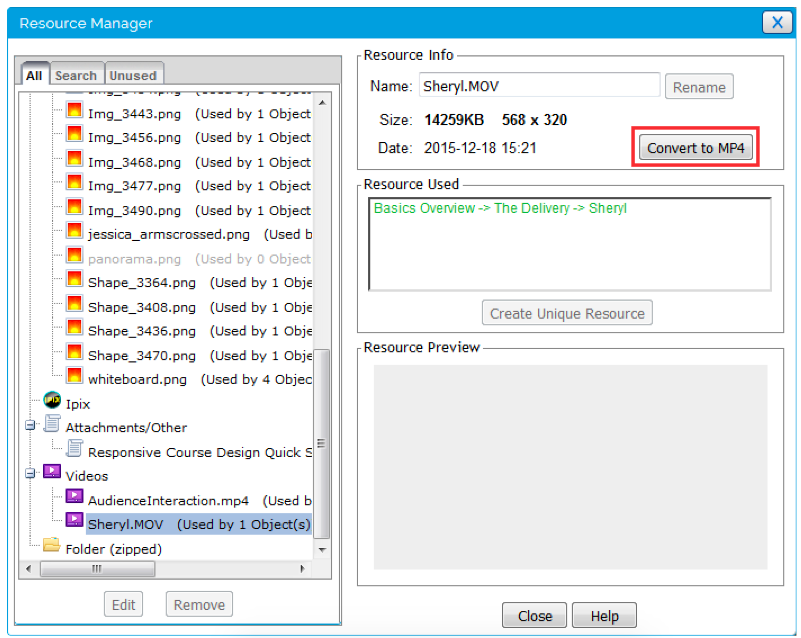
As I mentioned before, there is one feature of the Resource Manager in Lectora Online that differs from the desktop version of Lectora. You can choose to optimize the file sizes of selected image files, audio files, or video files by clicking the Optimize Size or Convert to MP3/MP4 buttons in the Resource Info panel.
When an image has been scaled down from its original size, the Optimize Size button will enable when you select that resource in the left-hand pane. Clicking the Optimize Size button will reduce the file size and dimensions of the resource to just what is needed for the image to display at the size to which it has been scaled.
If the selected audio or video resource isn’t already in MP3 or MP4 format, clicking the Convert to MP3/MP4 button will optimize and convert the files to those formats. These are the optimal formats for delivering audio and video on the web.