
Just like my closet before spring cleaning, sometimes the objects in Lectora® e-Learning software’s Title Explorer need a little organization. When you group objects, you combine them, so you can work with them as a single unit. Not only does this better organize your Title Explorer, but it allows you to apply transitions, actions and properties to several objects at once.
Before we dive into the many benefits of grouping, let’s discuss the two ways you can easily create a group.
Group Objects That Already Exist
Groups can contain all kinds of objects, images, text blocks, audio and actions (we’ll focus on action groups in a later blog post). To group a set of objects that are already created, complete the following:
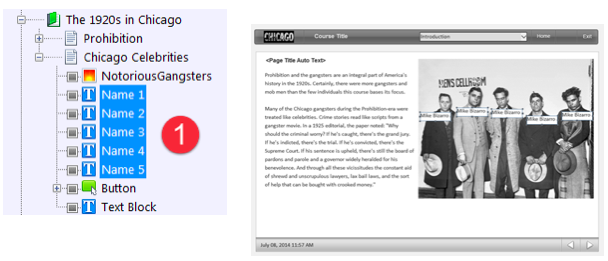
1. Select the objects within the Title Explorer or the work area. Hold down the Ctrl key to select multiple objects.
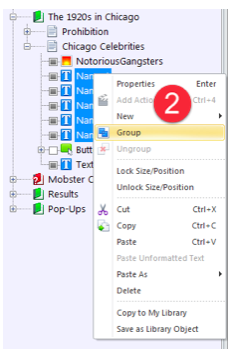
2. While the objects are selected, right-click and select Group from the context menu.
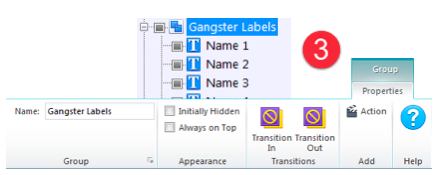
3. Objects are now grouped and can be worked with as a single unit. Rename the group for more clarity and adjust group properties as necessary.
Adding a Group to Your Title
If the objects you wish to group are not already created, you have the ability to create a group first and add objects to it later. To add a group to your title, complete the following:
1. Select the location in the Title Explorer that you want to add a group. Don’t forget, groups are great for organizing objects at the title, chapter or section levels too. You’re not restricted to just the page level.
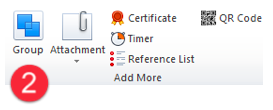
2. There are several ways you can add a group:
3. You can drag and drop existing objects from the Title Explorer into the group, or keep the group highlighted when adding new objects to the title.
Important Note: Once objects are grouped, you can’t move individual objects within the group. For example, if you have a text block that is grouped with other objects, all of the objects will move when you try to move just the text block. To move objects individually, select the object from the Title Explorer or work area. Holding down the Alt key, click and drag the object to the desired position on the page.

Benefits of Grouping
Ungrouping Objects
When spring cleaning hit last year, I organized all the clothes in my closet by color. Red shirts hung next to red pants (in case you’re wondering, no, I don’t have more than 1 pair of red pants), black skirts hung next to black shirts, you get the idea. A week later my rainbow inspired closet was making me dizzy, so I scattered all of my clothes with no regard to color grouping.
When developing a title, your design or logic might change and you need to ungroup a set of objects you had previously grouped. To ungroup objects, complete the following:
1. Right-click the group icon in the Title Explorer on the group of objects you want to ungroup.Select Ungroup from the context menu.
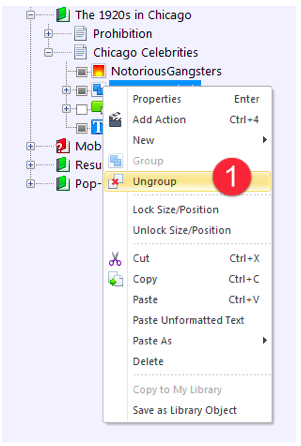
The objects have been ungrouped. You can now work with each object individually.
Subscribe to the Lectora e-Learning Blog for more Lectora how-to tutorials and tips.
.svg)
