In this 4-part blog I’m going to show you how to leverage jQuery to take your Lectora® e-Learning courses beyond “good” and into the “awesome” territory. Let’s start with Part 1, where we’ll learn how to add the jQuery library to your title as well as how to use it for a cool little trick.
Wait, what’s jQuery?
jQuery is the world’s most popular JavaScript library that allows developers to select elements on a page and manipulate them. In this tutorial, I assume that you have a very basic knowledge of JavaScript and jQuery. If not, I highly recommend learning about it by taking a course at the Codecademy.com or a similar site.
Integrating jQuery
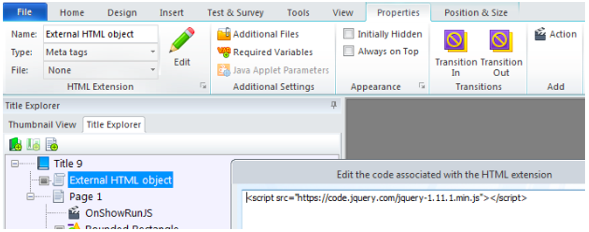
1. Add an External HTML Object to the top level of your title (click Insert > HTML Extension)
2. Select the object, click Properties and set its type to “Meta tags”.
3. Click the pencil icon to edit the object and type the following code:
<script src="https://code.jquery.com/jquery-1.11.1.min.js"></script>
If you don’t want to rely on someone else’s server, you can download the file from www.jquery.com, attach it to your title and replace the above code with this:
<script src="jquery-1.11.1.min.js"></script>
That’s it. If you want to test it, preview any page in browser, open the developer’s console (F12) and type “$.fn.jquery”. You should see “1.11.1” as a response in the console.
Let’s do something cool with it now.
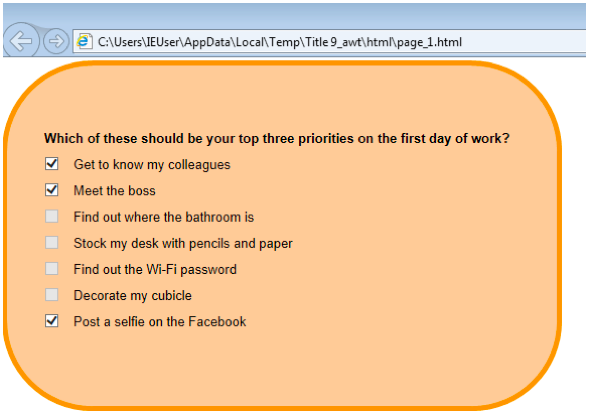
Limiting checkboxes in a quiz
Let’s say we want our learner to select no more than three options out of seven. We cannot do that in Lectora alone. Let’s use jQuery to do that.
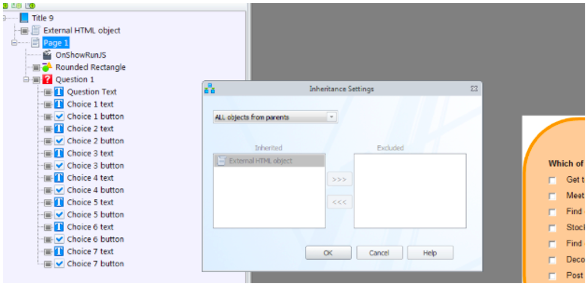
1. Create a page with a multiple-response question that contains 7 options. Please note that if this page is part of a Test, it’ll disinherit all objects from the title level, so make sure your External HTML Object is inherited on the page before you proceed.
2. Add an action to the page: On Show Run JS. Click Action tab and enter the following 8 lines:
$('input').click(check_and_limit);
function check_and_limit() {
if ($('input:checked').length == 3) {
$('input:not(:checked)').attr('disabled', true)
} else {
$('input').attr('disabled', false)
}
}

Let’s look at it line by line:
//run the check_and_limit() function each time an input tag (checkbox) is clicked
$('input').click(check_and_limit);
function check_and_limit() {
//if 3 checkboxes are checked...
if ($('input:checked').length == 3) {
//disable all remaining (unchecked) inputs
$('input:not(:checked)').attr('disabled', true)
} else {
//re-enable all checkboxes
$('input').attr('disabled', false)
}
}
So, this script runs on page load, attaches itself to the checkboxes and controls them based on how many are chosen. It doesn’t interfere with the quiz functionality in any other way.
Now you can check out the live demo or download the whole title.
Stay tuned for Part 2, where we learn how to optimize the coding and debugging workflow as well as learn another cool trick.
Subscribe to the Lectora e-Learning Blog for more Lectora how-tos and e-Learning tips.
.svg)
